Interacting with Flight Software
This guide will show you the process of interacting with flight software using tmtclab. We will cover starting tmtclab, importing a Spacecraft Database (SCDB), invoking an Action, and checking the Packet Monitor.
Building the Deployment
This how-to guide will use the demo_linux Deployment.
From the FSDK root directory, use the following command in a terminal to navigate to Source directory
cd OBSW/Source/The Deployment needs to be generated to produce a spacecraft_database (SCDB). The SCDB contains a description of all the Components within the Deployment. It allows tmtclab to interact with the flight software without requiring the labour-intensive construction of a packet database.
Execute the following codegen command to generate the demo_linux Deployment and produce a SCDB:
codegen deployment generate demo_linuxExecute the following make commands to build the app module, demo_linux Deployment, and framework module:
 make -C app force target
 make -C framework force target
make -C demo_linux force target|
|
Starting tmtclab
The tmtclab ground software requires very little configuration to communicate with Deployments produced in the FSDK. The first step is to launch the tmtclab executable.
Open a new terminal in the to the FSDK root directory and navigate to the TMTCLab directory:
cd ./GNDSW/TMTCLab/Execute the following command to launch tmtclab:
./GNDSW/TMTCLab/runLab.cmdLoad the SCDB into tmtclab
A splash screen should now pop up, confirming that tmtclab is loading.
Once tmtclab has launched, click the Manage deployments button to load the demo SCDB.

Select the obsw target, and then click Set deployment….
|
If you have used tmtclab before and already have a Deployment set, this button will instead read 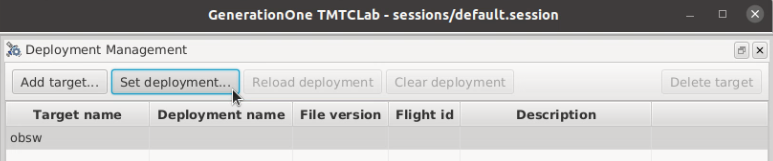
Figure 3. Set Deployment Button
|
This launches the Open new SCDB… dialog:
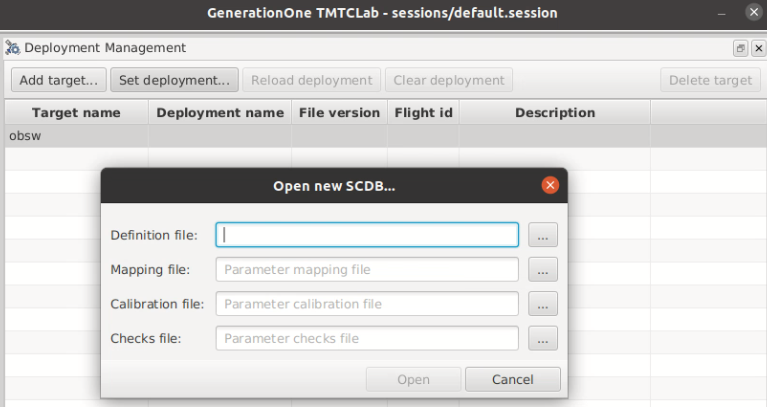
Click the … file selector button to the right of Definition file:, select the SCDB generated above: OBSW/Source/demo_linux/doc/deployment.scdb, and click Open.
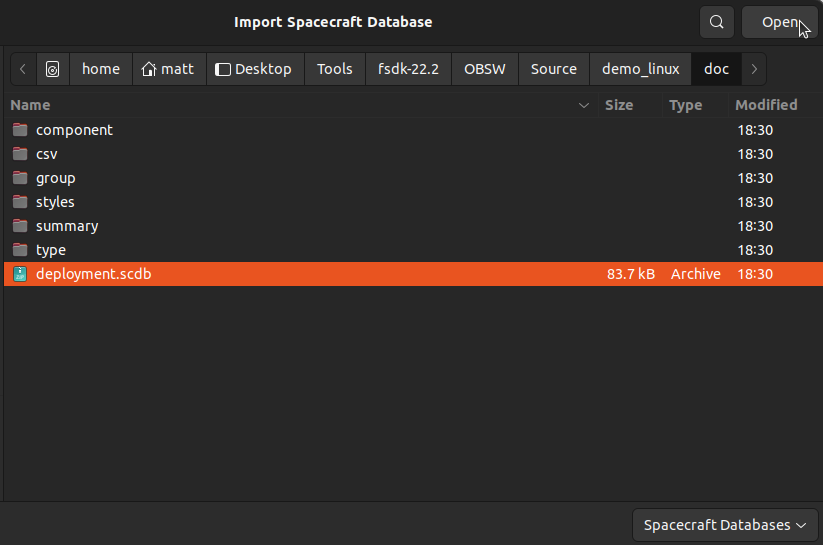
Select Open to import the SCDB.
Finally, close the Deployment Management dialog.

These configuration steps only need to be carried out once. tmtclab will now load this SCDB automatically on startup.
Connecting to the Flight Software
To communicate with the running flight software, you’ll need to configure tmtclab as a TCP client.
Select the Connect… button to open the Connect to Onboard Software dialog

In the Connection type: dropdown, select TCP Server. Ensure that the Port is set to 51423 and Framing is set to Packet stream, then click Connect

The connection indicator in the bottom-right corner of the tmtclab main window should now report that the server has started:

Starting the Flight Software
The newly created binary file can now be executed to start the flight software.
Execute the following command to start the flight software.
./demo_linux/bin/linux/demo_linuxThe connection indicator in the bottom-right corner of the tmtclab main window should now report that the flight software is connected:

Invoking Actions
On the left-hand side of the tmtclab main window, find the Asset node in the tree. This represents the spacecraft tmtclab is connected to - in this case the asset is your Linux computer.
The 'demo_linux' Deployment is located in the Asset/obsw node. Expanding this displays the component instances within the Deployment.
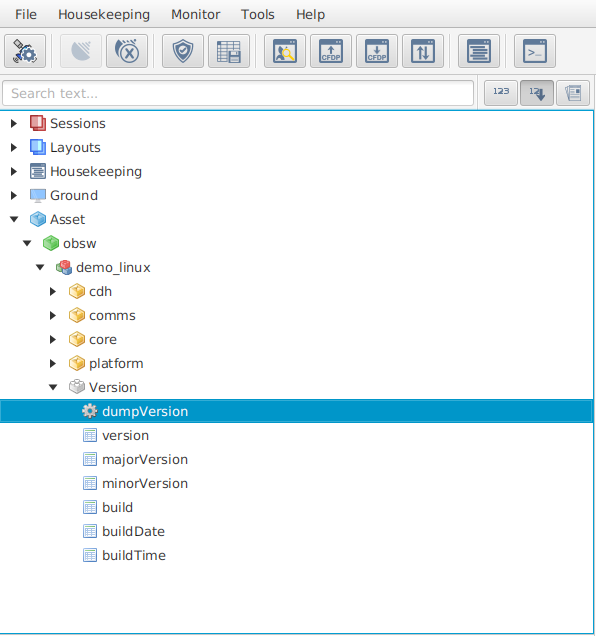
Within the Version component instance, double-click on the dumpVersion Action to launch an action invocation dialog. Select the Invoke action ➡ button to invoke the dumpVersion Action.

The demo Deployment should print your message to the terminal in which it is running.

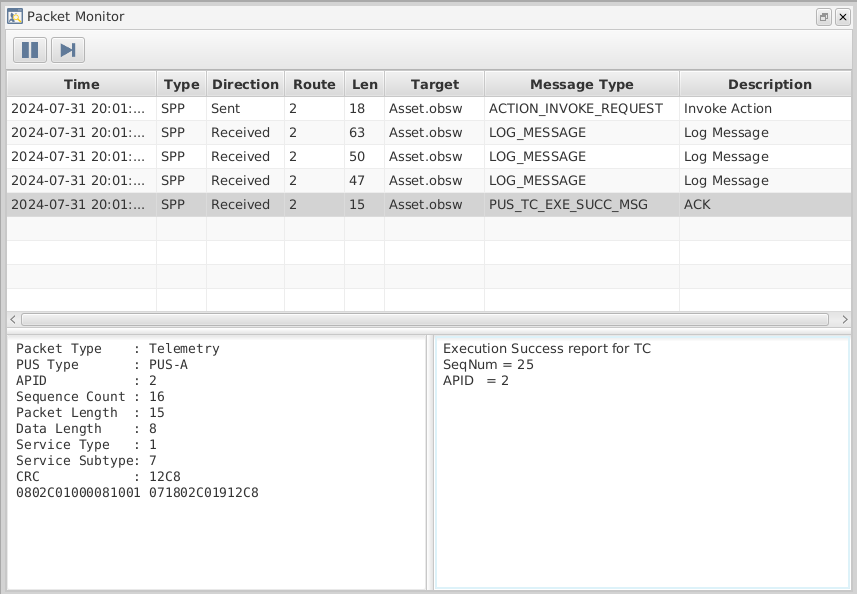
Viewing the Packet Monitor
You can see the details of the telecommands and telemetry sent between the ground and flight software by looking at the Packet Monitor view:
Select the Packet monitor button:

The Packet Monitor window should now be visible. Notice that the telecommand for the dumpVersion Action is acknowledged automatically by the flight software.
Selecting a packet provides further information about the packet data.